Current Page: Photo Graphic Apps - Super Photocut For Mac - Tutorials - How to Replace Sky in Photo for Mac
Current Page: Photo Graphic Apps - Super Photocut For Mac - Tutorials - How to Replace Sky in Photo for Mac
As a photographer, one of the most disappointing things is to take a photograph of something once in lifetime chance but the weather let you down. So, instead of wonderful blue skies you’ll get grey or dull skies in your photo.
PhotoShop is not necessary any more. Save your money and time. Let's get started to replace sky in a photo with Super PhotoCut for Mac!
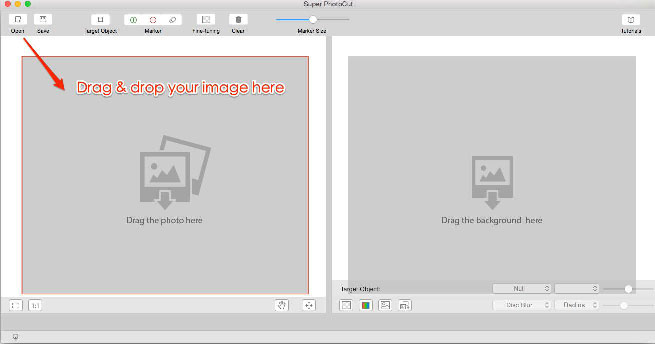
Step 1. Double click to open Super PhotoCut for Mac in Applications or Launchpad or on desktop.

Step 2. Locate the image that you want to open, directly drag and drop it to the left.
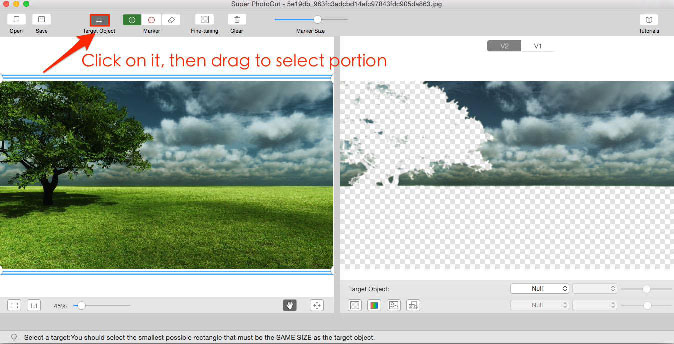
Step 3. Use Target Object to surround the portion that you want to cut out.
Please note:
1. Include every pixel that you want to retain in the rectangle box.
2. Make a rectangle selection as small as the cutout shape to get a more accurate result.
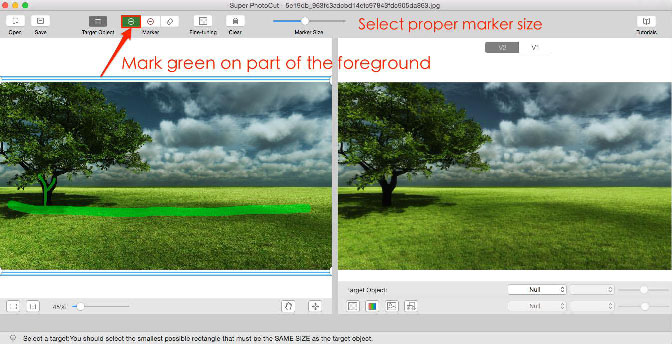
Step 4. Use the green tool to mark part of the foreground.
Please note:
1. You do not have to carefully select the areas, just make sure that the green marker touches any colors that you want to keep.
2. Make sure you stay within the lines of the object you want to cut out.
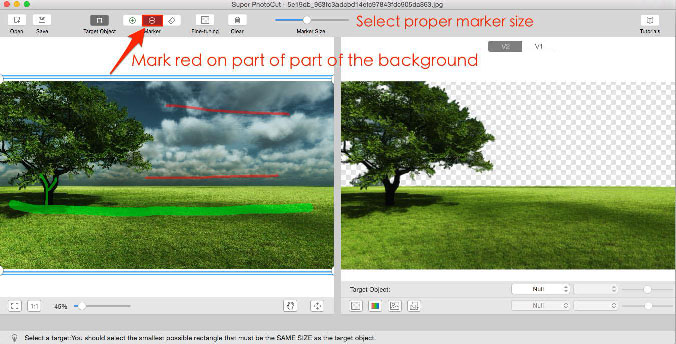
Step 5. Use the red tool to mark part of the background.
Please note:
1. You do not have to carefully select the areas, just make sure that the red marker touches any colors that you want to become transparent.
2. Do not mark red on the foreground.
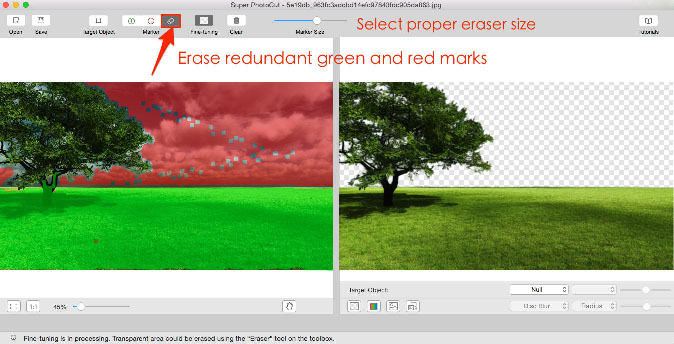
Step 6. Use Fine-tuning tool to refine edges and cut out semi-transparent portions.
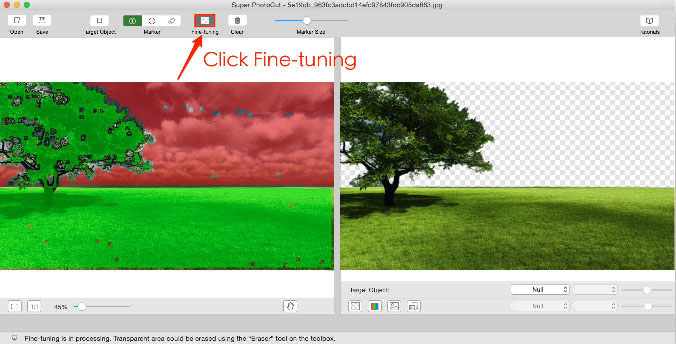
Tips.
1. Fine-tuning is used to cut out semi-transparent objects like weeding dresses, glasses, gauze... It will automatically separate foreground from background.
2. Use Eraser tool to wipe out wrongly marked strokes on the silhouette of items. You do not have to mark green on narrow regions around edges that you want to keep, like hair, tree leaves, fur, grass and so forth, as our smart algorithm takes care of details.
3. Use the green tool and red tool to mark on pixels that are not included or excluded in the cutout.
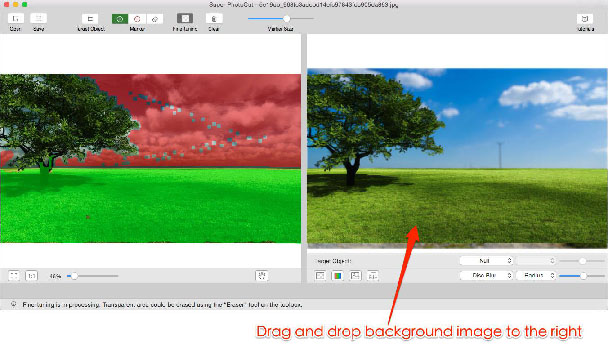
Step 7. Locate the image that you want to use as background, drag and drop it to the right.
Tips.
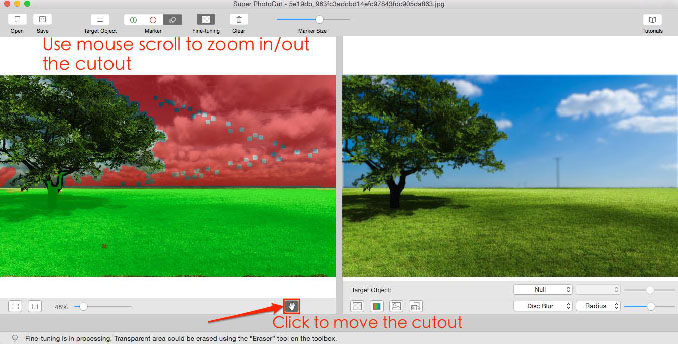
1. Use mouse scroll to zoom in or out the cut out portion to create a consistent view.
2. Use Hand tool to drag that portion to the appropriate position on background.
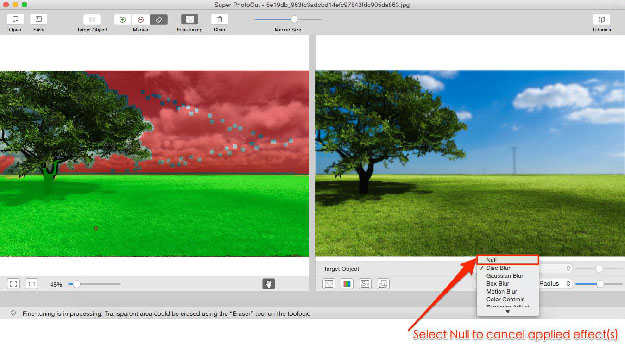
3. Super PhotoCut will apply disc blur effect to background to avoid sharp contrast by default. Select Null if you don’t want to use any special effect.
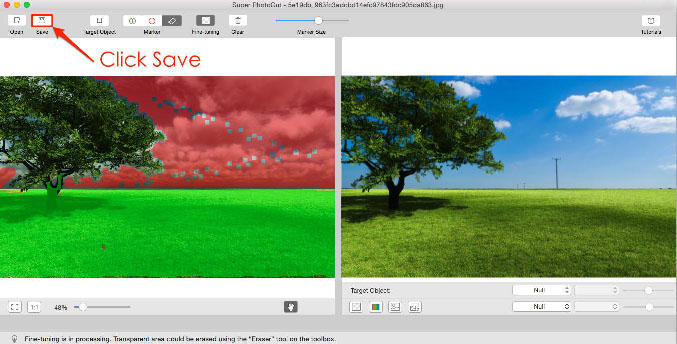
Step 8. Save you result.
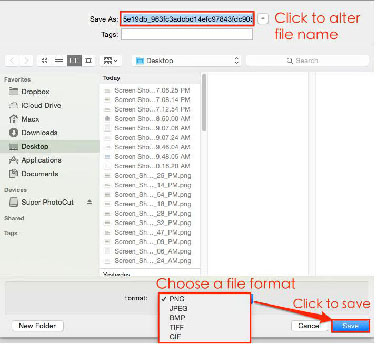
Tips.
1. Directly copy the result to clipboard by pressing Command and C for instant use.
2. Only PNG retain transparency. Or it will use white color as the background.
3. The result will not replace your original one and will automatically postfix “_cut” to the file name by default.
And there we have it! That's how to easily replace the sky in a photo using a simple selection from Super Photocut for Mac. The result after replacing the sky:

 |
 |
 |
| Super PhotoCut Pro Mac Removing Image Background from Transparent Objects ( veil, glass, water, fire... ) |
Super Vectorizer Mac Auto Trace Images of color and Grayscale, Black-and-white, Skeletonization, Line |
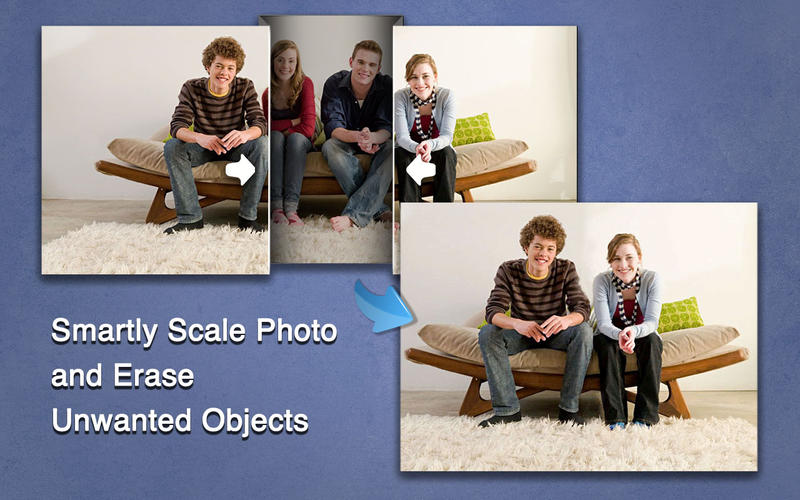
Photo Eraser Pro Mac Removes Unwanted (Watermark, Date, People...) from Photo and Scales an Image |
| Free Download. Full Features | Free Download. Full Features | Free Download. Full Features |


