Free · No sign-up · Runs in your browser
Photo Filters Online — Presets, Black and White, Vintage
Some photos arrive flat: shot indoors at dusk, scanned from a print that has faded, or lit by whatever bulb was in the room. A filter preset fixes the mood in one click, and the sliders underneath fix the light itself. This page does both, without uploading the file — the image is decoded in the tab you are reading, so the original never leaves your machine and is not modified unless you save a new copy. The section below is explicit about which adjustments exist and which do not, because "add a filter" means very different things depending on the tool.
- Presets plus manual sliders
- True black and white at zero saturation
- JPG, PNG and WebP export
- No account, no watermark
How to apply photo filters online
Four moves, no layers to learn. Every click is reversible until you export.
-
Load the photo
Click Open, drag the file in, or paste it from the clipboard. JPG, PNG, WebP, GIF and BMP open straight away and the browser reads the bytes locally.
-
Click through the presets
Open the Filter tab and try the looks one after another. Selecting a new preset replaces the previous one rather than stacking it, so you can compare freely without undoing anything.
-
Correct the light underneath
Switch to Finetune for brightness, contrast and saturation. Brightness nudges the whole frame up or down, contrast widens or narrows the gap between shadows and highlights, and saturation slides from fully grey to twice as colourful.
-
Add a vignette, then save
A vignette darkens the corners so the eye stays on the subject — useful on portraits and product shots with a busy background. Press Save and pick JPEG, PNG or WebP; the file on your disk is never overwritten.
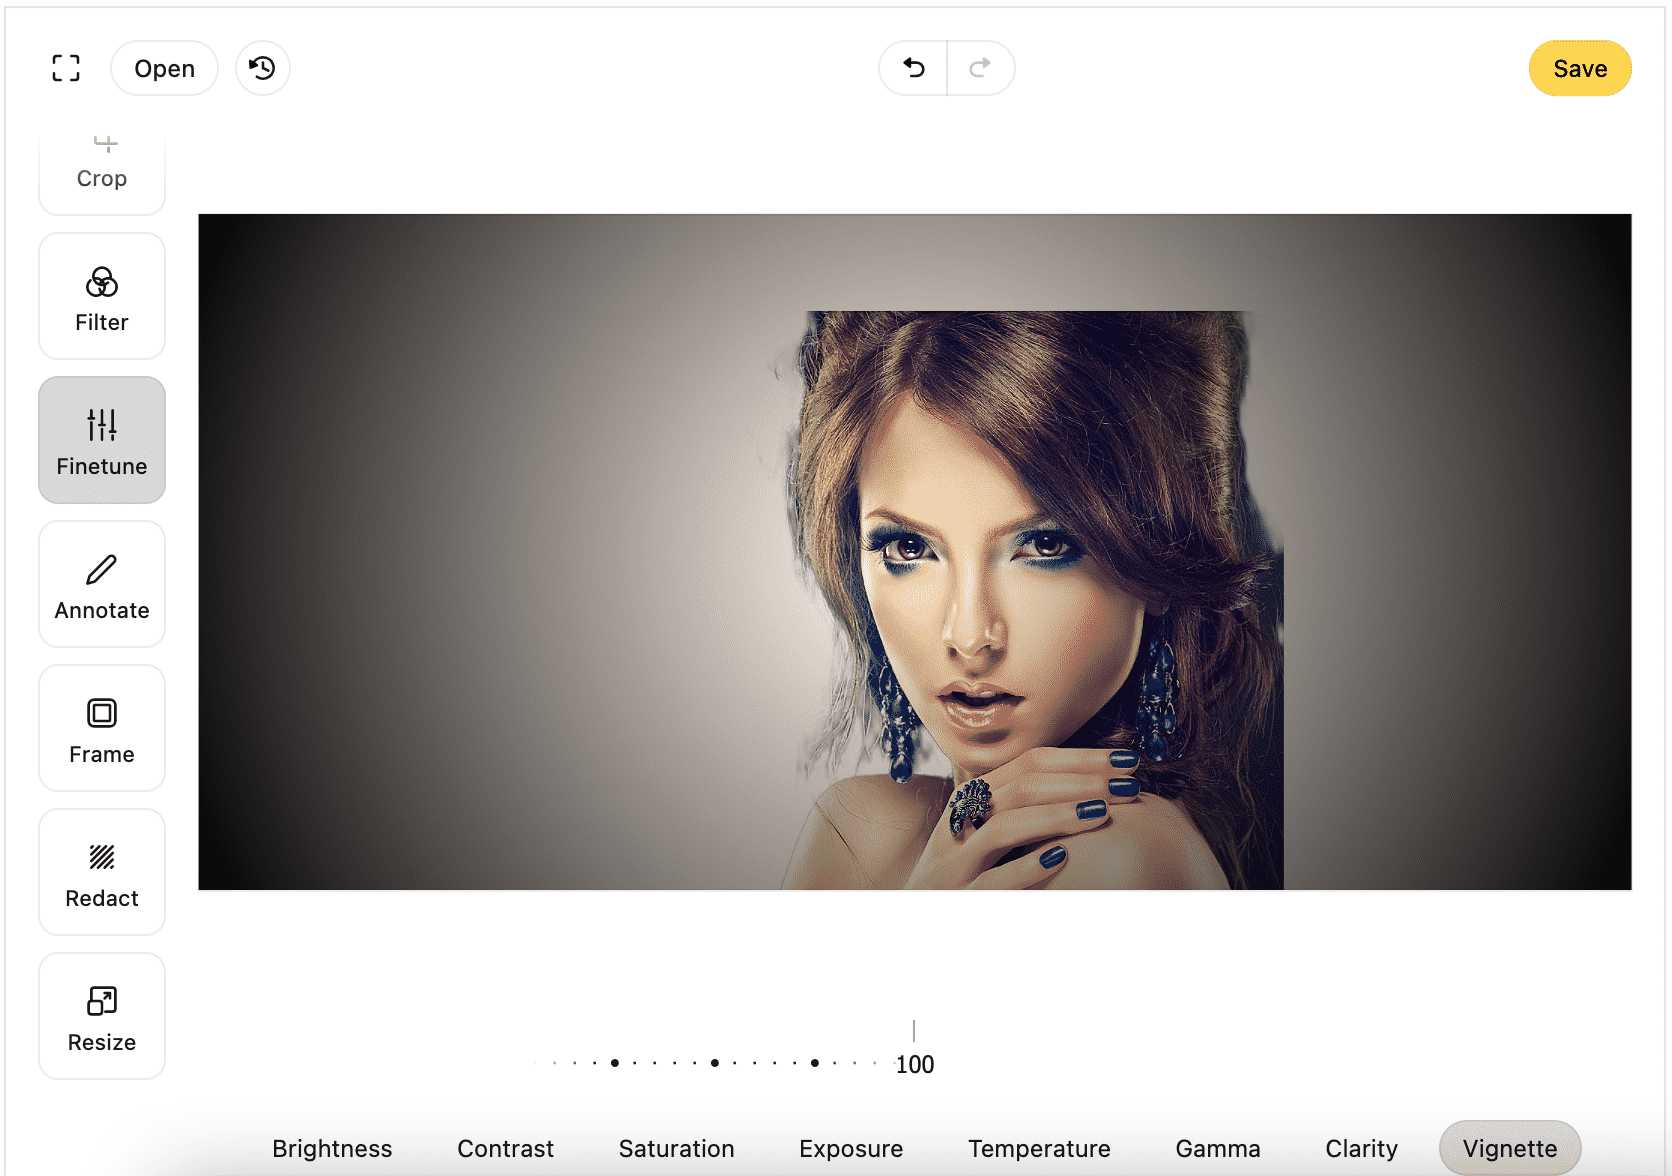
Four controls, and what each one is actually for
A filter preset changes the colour recipe. The sliders change the light. Most photos need both, in that order.
Presets
One click for a whole look, and one click to swap it for another. Nothing is baked into the picture until you export, so browsing costs nothing.
Brightness and contrast
Brightness moves the whole frame up or down in modest steps; contrast decides whether the picture reads as crisp or washed out. Indoor phone shots usually need a little of both.
Saturation, down to zero
Pulling saturation all the way to the left is a genuine greyscale conversion, not a coloured tint. Raise contrast after that or the result looks grey and lifeless.
Vignette and frames
A soft corner darkening plus an optional border finishes a photo that otherwise looks like it was cropped out of a larger scene.
Three looks people actually come here for
Same tool, three different recipes.
- Black and white that is not muddyDrop saturation to zero, then push contrast up until the midtones separate. If the shadows block up, lift brightness a step and try again.
- Faded vintagePick a muted preset, lower contrast a notch and raise brightness slightly. That combination mimics a print left in the sun without adding grain, which this editor does not do.
- Bright and clean for listingsA small brightness lift plus a small contrast lift makes a second-hand item look presentable in a grid of thumbnails, without turning the colours unnatural.
- One consistent set for a feedNote the preset and the three slider values, then repeat them photo by photo. Nine images with the same treatment look deliberate; nine different ones look like an accident.

When presets are not enough
PixelStyle adds curves, masks and 50+ filters on the Mac
The browser gives you one filter pass and three sliders — enough for a web post, not enough for a print. PixelStyle Photo Editor works on layers with masks, so an adjustment can be limited to the sky or the skin instead of the whole frame, and the effect of a filter can be dialled back by painting the mask rather than by choosing a weaker preset.
- 50+ filters and colour adjustments applied per layer
- Masks so an effect covers only part of the photo
- Healing brush and clone stamp for the spots a filter exaggerates
- Saves layered PSD, plus TIFF, JPG, PNG and WebP
Requires macOS · 7-day free trial · or download the .dmg
Filter questions people ask before they start
Straight answers, matching what the editor does.
Does applying a filter change my original file?
No. The photo is loaded into the browser tab and the preview is drawn on a canvas; the file on your disk is only read. A filter becomes permanent only in the new copy you export.
Can I combine a preset with manual adjustments?
Yes. A preset sets the colour recipe, and brightness, contrast and saturation are applied on top of it, so a muted preset with extra contrast is a normal combination.
How do I get a real black and white photo?
Set saturation to its lowest value in the Finetune tab — that removes colour entirely rather than tinting it. Follow with a contrast increase so the result does not look flat.
Is there a grain or film texture option?
No. This editor changes tone and colour only: presets, brightness, contrast, saturation, a vignette and borders. Film grain, sharpening and lens blur are not part of it.
Can I apply the same filter to a whole folder?
Not here — one photo is open at a time. Repeating a look across a large set is a desktop task, which is where PixelStyle comes in.
What happens to the filter when I export as WebP?
Nothing is lost. The filter and the slider values are rendered into the pixels before the file is written, so a WebP export looks the same as the JPG with a smaller file size.